|
First, I lofted the boat. I lofted it half-langth, which made it easier to see if the curves were fair. I screwed 5 sheets
of plywood on top of two-by-fours, and used the bottom edge for the baseline. I used a drywall square and a few nice long
clear fir battens. Lofting went very smoothly. the only tricky part was the tumblehome near the stern. Future builders
will not have to loft, as all the bulkhead and frame dimensions are on the plans.
I used standard lumberyard materials, A-C fir plywood and pine. I checked through the stack of pine at the lumberyard,
and picked out the clearest pieces I can find.
Epoxy is used for glue and coating. I used 1:1 laminating
epoxy from Fiberglass Coatings, Inc. (The most inexpensive I could find, less than half the price of WEST System. Check the
link below.) The 1:1 ratio was very easy to deal with, and also it had a much slower cure time than WEST System, a big advantage
in Missouri in August.
Fiberglass Coatings, Inc.
I assembled the 7 temporary frames for the cabin area of the boat out of 1-by-6 pine, with plywood gussets fastened with drywall
screws. They will be removed when the hull is complete, as there won't be any full-width bulkheads in the cabin area. The
rest of the frames were permanent bulkheads that will stay in the boat.
I assembled a strongback out of two-by-fours, and leveled it using a laser level. The laser level made the job go quickly.
I used a string to mark the centerline, and then fastened small uprights to the strongback where the frames will go. The frames
were then set up, plumbed and leveled, and held up with temporary battens. I used long battens to check to see if everything
was fair, and planed the frames.
The shear clamps and chine logs are two layers of one-by-four pine. I cut scarfes in the pine using a router and
a simple jig. I used a jigsaw to cut the notches, and cleaned them up with a rasp. Then, I drilled pilot holes,and glued the
chine logs and shear clamps using waxed drywall screws, which will be removed when the glue sets.
|
 |
|
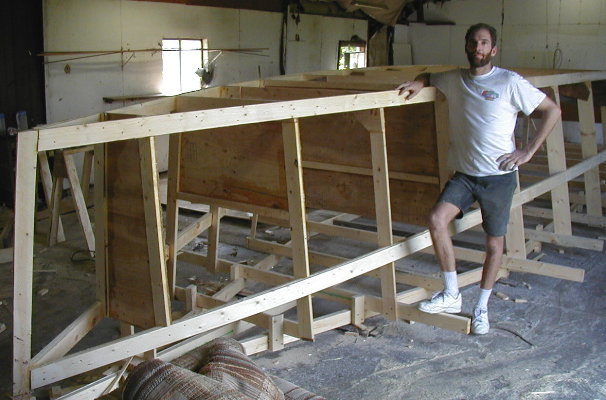
| The forward frames and bulkheads, and me. |
|
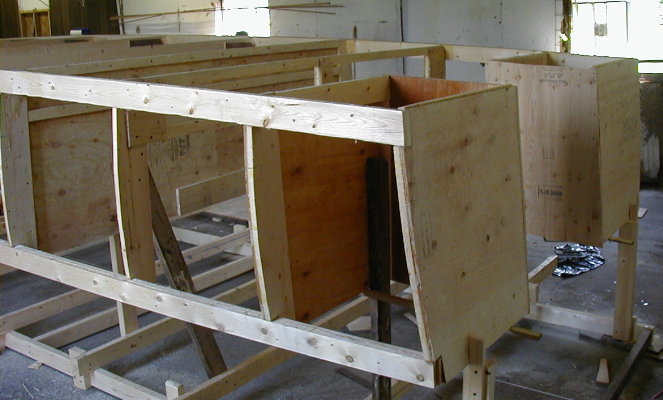
| Aft frames and motor well. |
|
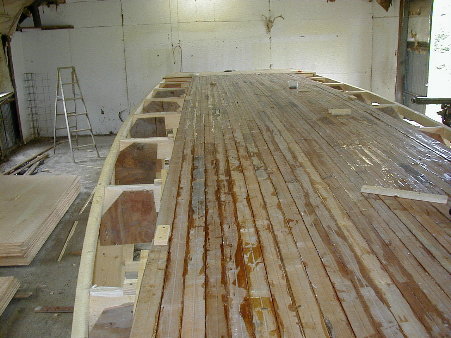
| First layer of fir planking |
|
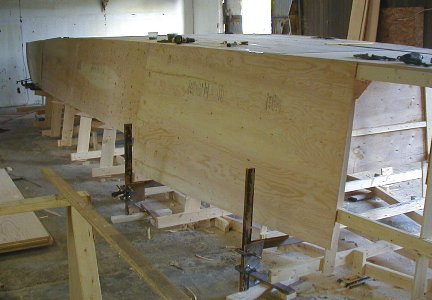
| First layer of side planking, showing temporary supports. |

|
| View from underneath |
|
|
|
|
|
|
|
For the first layer of the bottom, I used toungue-and-groove fir flooring that was torn out of an old house. It was wonderfull
stuff - all virtical grain, and no knots. It will later be epoxied and varnished and will serve as the cabin sole. I only
used it in the cabin area. The rest of the first layer was 3/4" plywood. I glued 3 rows of fir at a time. Blocks were
screwed to the frames, and wedges were jamed between the blocks and the planking to clamp them together. Wit the temparature
in the upper nineties, I had just enough time to glue 3 rows before the epoxy started to set.
After sanding the first layer of the bottom, the second layer, 1/2" plywood, was glued on. I marked and cut the pieces,
and then drilled pilot holes every 8" or so. I used a roller to spread thickened epoxy over both surfaces. Then, I screwed
it on using waxed drywall screws. After curing, I removed the screws, and then planed the edge around the chine.
The hull sides are two layers of 1/2" plywood. I made temporary supports to hold the plywood in place for marking. After
cutting the plywood, I drilled pilot holes where the permanent frames and the chine logs and shear clamps were. I glued it
using drywall screws.
The third layer of the bottom was 3/4" ply, making the bottom a full 2" thick. It was glued on after the first layer
of side planking. after the edges were trimmed, the second layer of side planking was glued on. I then made a false stem,
and carved it to shape. The slot for the off-centerboard was cut out also.
After filling all screw holes and sanding,the
hull was sheathed with one layer of Xynole-Polyester cloth, availible from Defender Indestries. (Link below)
Defender Industries
To apply the cloth, I layed it on the uncoated plywood, and then applied epoxy with a roller. I used just enough epoxy to
soak the cloth. When that was still sticky, I rolled another coat of epoxy on. After it was fully cured, I sanded it and then
used a trowel to spread epoxy thickened with talc. It was sanded again, using a long sanding board, and more thickened epoxy
was trowelled on. Then more sanding.
After I got tired of sanding and filling,I marked the waterline, using my laser level, and painted it with ablative bottom
paint. (much easier to do when the boat is upside down)
I will have to do more fairing on the topside after the hull
is turned over.
|
|