|
The Xynole cloth was layed on the bare wood and cut to shape. Unthickened epoxy was rolled on with a foam roller, just enough
to soak through the cloth. When the epoxy was still tacky, a second coat was applied.
After the second coat of epoxy cured, it was rough-sanded to remove the high spots and drips. Then, epoxy thickened with talc
was applied with a wide drywall trowel. When that cured, it was sanded smooth. A second pass with thickened epoxy was applied,
and sanded again.
The waterline was marked using a small lasar level, and then the bottom was painted with ablative-copolymer antifouling paint.
Before turning the hull, it was set on blocks and the temporary framing and strongback was disasembled.
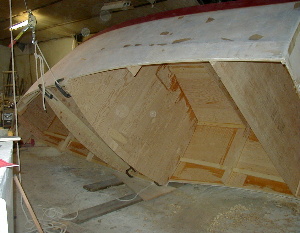
Two-by-fours were screwed to the main bulkheads at the shear for stiffening. A two-ton come-along was used to lift the side
of the boat. It was attached to an overhead beam, and to clamps on the side of the boat at the two main bulkheads. Clamps
were put on the other side of the boat, and it was lowered to a piece of 3/4" plywood set on two beams, using a jack
and blocking. A lever was used under the plywood to slide the boat sideways as it was rolled over.
As the side was lifted, the hull was slid sideways, untill the balence point was reached. Then, the hull was held in place
while the come-along was changed to go under the bottom of the boat. The boat was then lowered untill the skeg could be put
on blocks, and then it was levelled using a jack and blocking.
The whole process took just over 3 hours with two people.

|

