|
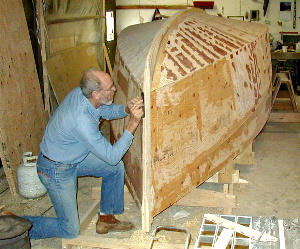
The side panels were held in place with screws and marked from the inside for cutting. Then pilot holes were drilled, and
they were glued in place, with 8" butt blocks between pieces. The upper planking had a wide butt block, filling the space
between 2 frames where the window will be, so that part of the planking is 1" thick.
After the glue cured and the edges at the chine were trimmed, the second layer of the bottom was laminated on.
1/4"
plywood was cut to shape, with the outer grain going accross the hull, at right angles to the first layer.
The forward
planks were ripped to 1 foot wide pieces, to take the twist.
Pilot holes were drilled every 6" in the large pieces
of 1/4" plywood. The forward pieces were drilled enough to have screws through each 2" strip of 1/2" plywood.
Thickened epoxy was rolled on all the gluing surfaces, and the pieces were screwed in place with lots of waxed drywall screws.
The glue on the first piece was too thick, and it oozed out the screw holes before screws were put in. The epoxy was carefully
cleaned off the screw heads, so they could be removed later. Of course a few were missed, so they will remain in the boat.
The ends sticking through the inside can be snapped off by hitting them with a hammer.
After the epoxy cured, and the screws were removed, the holes were filled with thickened epoxy.
The stem was cut to a pattern, and laminated together with two pieces of 3/4" pine, and 1 piece of 1/2" plywood.
The forward part of the keel was also cut to a pattern, and laminated together with two layers of 3/4" plywood and 1
layer of 1/2" plywood. Both pieces were then glued in place.
The stem was then carved down with a hand plane and sander.
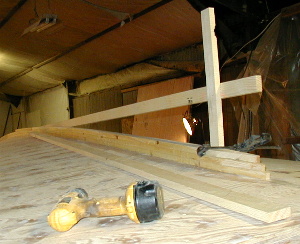
A jig was made up to the shape of the skeg, which will be stack-laminated with 2" by 3/4" pine. 3 galvanized carriage
bolts were bolted through the first 3 layers of skeg.
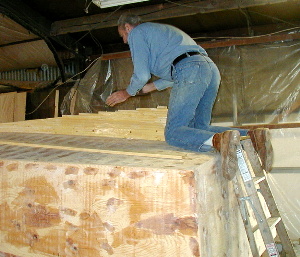
After the skeg was stack-laminated, it was planed down flat. After looking at the skeg, we decided it was too deep, so we
cut a few inches off it with the skillsaw, and planed it again. The skeg was then sanded smooth, and a fillet was added. A
little more filling and sanding, and the hull will be ready for sheathing.
|